The choice of resin for impregnation is mainly governed by the the intended use of the thin section slide. In the case of soil thin section production the most widely used resin is polyester (Polylite 32032-00). This resin has a number of advantages, and some disadvantages. Polylite is relatively cheap, can easily be thinned with acetone and the curing time is long enough to allow complete impregnation. The disadvantage is that the resin comes in styrene monomer solvent which is potentially carcinogenic, therefore all work must be done in a fume cupboard and the technician must wear lab coat, gloves and eye shields at all times. The procedure for the use of this resin is as follows: –
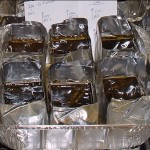
Samples must be dry (see methods:drying), the perforated lid is removed from the Kubiena tin and the sample encased in an aluminium former (see image). The sample is placed in a vacuum chamber and resin is poured in along a glass rod to avoid disturbing the sample. The chamber is then sealed and evacuated to around 20 mm of Mercury (Hg) and left overnight.
The resin mixture is determined by the type of sample, however for most soil and sediments the mix ratios in the table below are used. The catalyst is methyl ethyl ketone peroxide (MEKP).
| soil type | resin (cm3) | catalyst (cm3) | acetone (cm3) |
|---|---|---|---|
| Loose, sandy, friable | 350 | 0.2 | 50 |
| Firm, compact, cohesive | 350 | 0.2 | 50-70 |
| Very compact clay | 350 | 0.2 | 70-100 |
| Very organic, Peaty | 700 | 1.8 | 70-100 |
There are many other resins which could be used to impregnate soils but the only others used here at Stirling with any regularity are epoxy resin (Araldite MY750 + hardener HY956) and Poly Ethylene Glycol (PEG 8000). Epoxy resin is often used in cases where soil thin section slides are to be subjected to micro-probe analysis for example since it is more stable in these cases than the polyester resin. There are unfortunately significant problems in using epoxy resin, firstly it is more expensive so may be prohibitive for large numbers of samples, the curing time is also significantly less than that for polyester resin and there is the danger of incomplete impregnation of the sample and lastly it is much more viscous that polyester resin and needs to be thinned but is less miscible with acetone than polyester resin. See the mixing guide below.
| soil type | resin (cm3) | catalyst (cm3) | acetone (cm3) |
|---|---|---|---|
| Loose, sandy, friable | 400 | 38-40 | 60 |
| Firm, compact, cohesive | 400 | 38-40 | 70-80 |
| Very compact clay | 400 | 38-40 | 70-100 |
| Very organic, Peaty | 400 | 38-40 | 150 |
Once the choice of resin (polyester or epoxy) and mix has been decided the samples are normally placed under vacuum overnight. Care should be taken not create to great a vacuum so as to avoid disturbing the sample, experience has shown that a vacuum of ~20mm of Hg is optimal.The samples are then removed from the chamber and left in the fume cupboard to continue curing. During this stage the samples need to be monitored regularly as the solvents evaporate the level of resin will drop so this needs to be topped up two or three times to maintain the level above the surface of the sample.
Polyester impregnated samples will cure generally at a slower rate that those with epoxy resin and as stated before this is preffered. Depending on the resin mix used polyester samples will be kept in the fume cupboard for around 2-3 weeks, after which they are placed in an oven at 40oC (which is also vented to the fume cupboard) to ensure that any residual styrene and acetone solvents are removed which usually takes a further week.
Samples impregnated with epoxy resin will cure at a faster rate and do not need to be placed in the oven at all. The main problem with this resin is ensuring the curing rate is slow enough to fully impregnate the soil sample.
The third ‘resin’ used at Stirling is Poly Ethylene Glycol (PEG 8000). This was selected for a very particular set of samples where water removal could not be performed due to the risk of losing volatile organic compounds. PEG 8000 is water soluble and has a low melting point of around 59oC. Samples are taken directly from the field site and molten PEG poured onto them ensuring that the sample is completely covered in PEG at all times. The samples are then placed in an oven at around 60oC to keep the PEG liquid and monitored regularly. After about 1-3 weeks (depending on sample size) they are removed and allowed to reach room temperature and harden.
